This article shows how to implement the OAuth2 Implicit Flow with an AngularJS client and IdentityServer4 hosted in ASP.NET Core 1.1. The code was built using the IdentityServer4.Samples. Thanks to everyone who helped in creating IdentityServer.
Code: https://github.com/damienbod/AspNet5IdentityServerAngularImplicitFlow
History:
2017-08-15: Updated ASP.NET Core 2.0, Angular 4.3.6
Full history:
https://github.com/damienbod/AspNet5IdentityServerAngularImplicitFlow#history
Other posts in this series:
- OAuth2 Implicit Flow with AngularJS and ASP.NET Core 2.0 IdentityServer
- Authorization Policies and Data Protection with IdentityServer4 in ASP.NET Core
- AngularJS OpenID Connect Implicit Flow with IdentityServer4
- Angular OpenID Connect Implicit Flow with IdentityServer4
- Secure file download using IdentityServer4, Angular and ASP.NET Core
- Angular Secure File Download without using an access token in URL or cookies
- Full Server logout with IdentityServer4 and OpenID Connect Implicit Flow
- IdentityServer4, WebAPI and Angular in a single ASP.NET Core project
- Extending Identity in IdentityServer4 to manage users in ASP.NET Core
- Implementing a silent token renew in Angular for the OpenID Connect Implicit flow
- OpenID Connect Session Management using an Angular application and IdentityServer4
Note: Since ASP.NET Core RTM, the IISExpress requires admin rights and the cert needs to be added to the trusted roots to run in SSL.
Setting up the resource server
The resource server is a simple Web API service implemented in MVC in ASP.NET Core. A simple controller is used to implement CRUD methods for a SQLite database using Entity Framework Core. The resource server in the code example is hosted at the URL: https://localhost:44318/
The Startup class configures the security middlerware. CORS is activated because the client application needs to access the resource. The security middleware is configured using the UseJwtBearerAuthentication method and also the RequiredScopesMiddleware implementation taken from the IdentityServer.samples. The UseJwtBearerAuthentication options defines where IdentityServer4 can be found to authorize HTTP requests.
using AspNet5SQLite.Model;
using AspNet5SQLite.Repositories;
using Microsoft.AspNetCore.Builder;
using Microsoft.AspNetCore.Hosting;
using Microsoft.Extensions.Configuration;
using Microsoft.Extensions.DependencyInjection;
using Microsoft.Extensions.Logging;
using System.IO;
using Microsoft.AspNetCore.Authorization;
using Microsoft.AspNetCore.DataProtection;
using System.Security.Cryptography.X509Certificates;
using Microsoft.AspNetCore.Mvc.Authorization;
using Microsoft.EntityFrameworkCore;
using System.IdentityModel.Tokens.Jwt;
using System.Collections.Generic;
using Newtonsoft.Json.Serialization;
using IdentityServer4.AccessTokenValidation;

namespace AspNet5SQLite
{
    public class Startup
    {
        public IConfigurationRoot Configuration { get; set; }

        private IHostingEnvironment _env { get; set; }

        public Startup(IHostingEnvironment env)
        {
            _env = env;
            var builder = new ConfigurationBuilder()
                 .SetBasePath(env.ContentRootPath)
                .AddJsonFile("config.json");
            Configuration = builder.Build();
        }

        public void ConfigureServices(IServiceCollection services)
        {
            var connection = Configuration["Production:SqliteConnectionString"];
            var folderForKeyStore = Configuration["Production:KeyStoreFolderWhichIsBacked"];

            var cert = new X509Certificate2(Path.Combine(_env.ContentRootPath, "damienbodserver.pfx"), "");

            // Important The folderForKeyStore needs to be backed up.
            services.AddDataProtection()
                .SetApplicationName("AspNet5IdentityServerAngularImplicitFlow")
                .PersistKeysToFileSystem(new DirectoryInfo(folderForKeyStore))
                .ProtectKeysWithCertificate(cert);


            services.AddDbContext<DataEventRecordContext>(options =>
                options.UseSqlite(connection)
            );

            //Add Cors support to the service
            services.AddCors();

            var policy = new Microsoft.AspNetCore.Cors.Infrastructure.CorsPolicy();

            policy.Headers.Add("*");
            policy.Methods.Add("*");
            policy.Origins.Add("*");
            policy.SupportsCredentials = true;

            services.AddCors(x => x.AddPolicy("corsGlobalPolicy", policy));

            var guestPolicy = new AuthorizationPolicyBuilder()
                .RequireAuthenticatedUser()
                .RequireClaim("scope", "dataEventRecords")
                .Build();

            services.AddAuthentication(IdentityServerAuthenticationDefaults.AuthenticationScheme)
              .AddIdentityServerAuthentication(options =>
              {
                  options.Authority = "https://localhost:44318/";
                  options.AllowedScopes = new List<string> { "dataEventRecords" };
                  options.ApiName = "dataEventRecords";
                  options.ApiSecret = "dataEventRecordsSecret";
              });

            services.AddAuthorization(options =>
            {
                options.AddPolicy("dataEventRecordsAdmin", policyAdmin =>
                {
                    policyAdmin.RequireClaim("role", "dataEventRecords.admin");
                });
                options.AddPolicy("dataEventRecordsUser", policyUser =>
                {
                    policyUser.RequireClaim("role",  "dataEventRecords.user");
                });

            });

            services.AddMvc(options =>
            {
               options.Filters.Add(new AuthorizeFilter(guestPolicy));
            }).AddJsonOptions(options =>
            {
                options.SerializerSettings.ContractResolver = new DefaultContractResolver();
            });

            services.AddScoped<IDataEventRecordRepository, DataEventRecordRepository>();
        }

        public void Configure(IApplicationBuilder app, IHostingEnvironment env, ILoggerFactory loggerFactory)
        {
            loggerFactory.AddConsole();
            loggerFactory.AddDebug();

            app.UseExceptionHandler("/Home/Error");
            app.UseCors("corsGlobalPolicy");
            app.UseStaticFiles();

            app.UseAuthentication();
            app.UseMvc(routes =>
            {
                routes.MapRoute(
                    name: "default",
                    template: "{controller=Home}/{action=Index}/{id?}");
            });
        }
    }
}
The Controller class just requires the Authorize attribute to use the security middleware.
[Authorize]
[Route("api/[controller]")]
public class DataEventRecordsController : Controller
{
   // api implementation
}
Configuring the IdentityServer
IdentityServer is hosted in ASP.NET Core. This example uses ASP.NET Core Identity for the user management and EFCore with SQLite for persistence. The configuration has some important details when configuring the client, which must match the configuration in the resource server, and also the angular client. The IdentityServer in the code example is hosted at the URL: https://localhost:44318
The Startup class configures the server. This just adds the middleware and the SigningCertificate for HTTPS and the server is ready. Really simple for such powerful software.
The AddProfileService extension method, adds a custom IProfileService to the IdentityServer4. It is important that this is added at the end, otherwise the default profile service will be used.
using Microsoft.AspNetCore.Builder;
using Microsoft.AspNetCore.Hosting;
using Microsoft.EntityFrameworkCore;
using Microsoft.Extensions.Configuration;
using Microsoft.Extensions.DependencyInjection;
using Microsoft.Extensions.Logging;
using IdentityServerWithAspNetIdentity.Data;
using IdentityServerWithAspNetIdentity.Models;
using IdentityServerWithAspNetIdentity.Services;
using QuickstartIdentityServer;
using IdentityServer4.Services;
using System.Security.Cryptography.X509Certificates;
using System.IO;
using Microsoft.AspNetCore.Identity;
using Microsoft.AspNetCore.Authentication.Cookies;
using Microsoft.AspNetCore.Authentication.OpenIdConnect;

namespace IdentityServerWithAspNetIdentitySqlite
{
    public class Startup
    {
        private readonly IHostingEnvironment _environment;

        public Startup(IHostingEnvironment env)
        {
            var builder = new ConfigurationBuilder()
                .SetBasePath(env.ContentRootPath)
                .AddJsonFile("appsettings.json", optional: true, reloadOnChange: true)
                .AddJsonFile($"appsettings.{env.EnvironmentName}.json", optional: true);

            _environment = env;

            builder.AddEnvironmentVariables();
            Configuration = builder.Build();
        }

        public IConfigurationRoot Configuration { get; }

        public void ConfigureServices(IServiceCollection services)
        {
            var cert = new X509Certificate2(Path.Combine(_environment.ContentRootPath, "damienbodserver.pfx"), "");

            services.AddDbContext<ApplicationDbContext>(options =>
                options.UseSqlite(Configuration.GetConnectionString("DefaultConnection")));

            services.AddAuthentication();

            services.AddIdentity<ApplicationUser, IdentityRole>()
            .AddEntityFrameworkStores<ApplicationDbContext>()
            .AddDefaultTokenProviders()
            .AddIdentityServer();

            services.AddMvc();

            services.AddTransient<IProfileService, IdentityWithAdditionalClaimsProfileService>();

            services.AddTransient<IEmailSender, AuthMessageSender>();
            services.AddTransient<ISmsSender, AuthMessageSender>();

            services.AddIdentityServer()
                .AddSigningCredential(cert)
                .AddInMemoryIdentityResources(Config.GetIdentityResources())
                .AddInMemoryApiResources(Config.GetApiResources())
                .AddInMemoryClients(Config.GetClients())
                .AddAspNetIdentity<ApplicationUser>()
                .AddProfileService<IdentityWithAdditionalClaimsProfileService>();
        }

        public void Configure(IApplicationBuilder app, IHostingEnvironment env, ILoggerFactory loggerFactory)
        {
            loggerFactory.AddConsole(Configuration.GetSection("Logging"));
            loggerFactory.AddDebug();

            if (env.IsDevelopment())
            {
                app.UseDeveloperExceptionPage();
                app.UseDatabaseErrorPage();
            }
            else
            {
                app.UseExceptionHandler("/Home/Error");
            }

            app.UseStaticFiles();

            app.UseIdentityServer();
            app.UseAuthentication();

            app.UseMvc(routes =>
            {
                routes.MapRoute(
                    name: "default",
                    template: "{controller=Home}/{action=Index}/{id?}");
            });
        }
    }
}
The IdentityWithAdditionalClaimsProfileService is used to add the custom claims created from the custom properties defined in the ApplicationUser class from Identity. Using this interface, application specific claims can be added to the Identity user.
using System;
using System.Collections.Generic;
using System.Linq;
using System.Security.Claims;
using System.Threading.Tasks;
using IdentityModel;
using IdentityServer4.Extensions;
using IdentityServer4.Models;
using IdentityServer4.Services;
using IdentityServerWithAspNetIdentity.Models;
using Microsoft.AspNetCore.Identity;

namespace IdentityServerWithAspNetIdentitySqlite
{
    using IdentityServer4;

    public class IdentityWithAdditionalClaimsProfileService : IProfileService
    {
        private readonly IUserClaimsPrincipalFactory<ApplicationUser> _claimsFactory;
        private readonly UserManager<ApplicationUser> _userManager;

        public IdentityWithAdditionalClaimsProfileService(UserManager<ApplicationUser> userManager,  IUserClaimsPrincipalFactory<ApplicationUser> claimsFactory)
        {
            _userManager = userManager;
            _claimsFactory = claimsFactory;
        }

        public async Task GetProfileDataAsync(ProfileDataRequestContext context)
        {
            var sub = context.Subject.GetSubjectId();

            var user = await _userManager.FindByIdAsync(sub);
            var principal = await _claimsFactory.CreateAsync(user);

            var claims = principal.Claims.ToList();
            claims = claims.Where(claim => context.RequestedClaimTypes.Contains(claim.Type)).ToList();

            claims.Add(new Claim(JwtClaimTypes.GivenName, user.UserName));

            if (user.IsAdmin)
            {
                claims.Add(new Claim(JwtClaimTypes.Role, "admin"));
            }
            else
            {
                claims.Add(new Claim(JwtClaimTypes.Role, "user"));
            }

            if (user.DataEventRecordsRole == "dataEventRecords.admin")
            {
                claims.Add(new Claim(JwtClaimTypes.Role, "dataEventRecords.admin"));
                claims.Add(new Claim(JwtClaimTypes.Role, "dataEventRecords.user"));
                claims.Add(new Claim(JwtClaimTypes.Role, "dataEventRecords"));
                claims.Add(new Claim(JwtClaimTypes.Scope, "dataEventRecords"));
            }
            else
            {
                claims.Add(new Claim(JwtClaimTypes.Role, "dataEventRecords.user"));
                claims.Add(new Claim(JwtClaimTypes.Role, "dataEventRecords"));
                claims.Add(new Claim(JwtClaimTypes.Scope, "dataEventRecords"));
            }

            if (user.SecuredFilesRole == "securedFiles.admin")
            {
                claims.Add(new Claim(JwtClaimTypes.Role, "securedFiles.admin"));
                claims.Add(new Claim(JwtClaimTypes.Role, "securedFiles.user"));
                claims.Add(new Claim(JwtClaimTypes.Role, "securedFiles"));
                claims.Add(new Claim(JwtClaimTypes.Scope, "securedFiles"));
            }
            else
            {
                claims.Add(new Claim(JwtClaimTypes.Role, "securedFiles.user"));
                claims.Add(new Claim(JwtClaimTypes.Role, "securedFiles"));
                claims.Add(new Claim(JwtClaimTypes.Scope, "securedFiles"));
            }

            claims.Add(new Claim(IdentityServerConstants.StandardScopes.Email, user.Email));

            context.IssuedClaims = claims;
        }

        public async Task IsActiveAsync(IsActiveContext context)
        {
            var sub = context.Subject.GetSubjectId();
            var user = await _userManager.FindByIdAsync(sub);
            context.IsActive = user != null;
        }
    }
}
The ApplicationUser class is used to define the Identity user model which can access the resource. When the database is created for the ASP.NET Core Identity, the properties added in the ApplicationUser class will be applied to the Identity table. These properties are then used in the IdentityServerWithAspNetIdentitySqlite class.
using Microsoft.AspNetCore.Identity.EntityFrameworkCore;

namespace IdentityServerWithAspNetIdentity.Models
{
    // Add profile data for application users by adding properties to the ApplicationUser class
    public class ApplicationUser : IdentityUser
    {
        public bool IsAdmin { get; set; }
        public string DataEventRecordsRole { get; set; }
        public string SecuredFilesRole { get; set; }
    }
}
The following code is used to define the IdentityResources and also the ApiResources. This is the one of the big changes which came IdentityServer4. The configuration is not very strict and if it is not setup up correctly, you will receive no errors, it just won’t work. It is really important that you define your custom IdentityResource which is then used inside the ApiResource Scopes. It is also very important that your required user claims is defined at the same level as the Scopes inside the ApiResource and not inside the Scopes, otherwise your claims will not work.
public static IEnumerable<IdentityResource> GetIdentityResources()
{
	return new List<IdentityResource>
	{
		new IdentityResources.OpenId(),
		new IdentityResources.Profile(),
		new IdentityResources.Email(),
		new IdentityResource("dataeventrecordsscope",new []{ "role", "admin", "user", "dataEventRecords", "dataEventRecords.admin" , "dataEventRecords.user" } ),
		new IdentityResource("securedfilesscope",new []{ "role", "admin", "user", "securedFiles", "securedFiles.admin", "securedFiles.user"} )
	};
}

public static IEnumerable<ApiResource> GetApiResources()
{
	return new List<ApiResource>
	{
		new ApiResource("dataEventRecords")
		{
			ApiSecrets =
			{
				new Secret("dataEventRecordsSecret".Sha256())
			},
			Scopes =
			{
				new Scope
				{
					Name = "dataeventrecordsscope",
					DisplayName = "Scope for the dataEventRecords ApiResource"
				}
			},
			UserClaims = { "role", "admin", "user", "dataEventRecords", "dataEventRecords.admin", "dataEventRecords.user" }
		},
		new ApiResource("securedFiles")
		{
			ApiSecrets =
			{
				new Secret("securedFilesSecret".Sha256())
			},
			Scopes =
			{
				new Scope
				{
					Name = "securedfilesscope",
					DisplayName = "Scope for the securedFiles ApiResource"
				}
			},
			UserClaims = { "role", "admin", "user", "securedFiles", "securedFiles.admin", "securedFiles.user" }
		}
	};
}
The clients are also defined in the Config class. This must match the angular client implementation. The test server implements two test clients which activate the Implicit Flow. The RedirectUris are important and must match the client request EXACTLY, otherwise it will not work. The AllowedScopes also contain the dataEventRecords scope used for this application. The second client is the demo client from IdentityServer.samples.
If you require control over the lifecycle of the tokens, ie you want to do a full logout when your finished your session in your SPA, you should use AccessTokenType = AccessTokenType.Reference and AllowAccessTokensViaBrowser = true, so that the OpenID Implicit Flow with id_token and token is used.
public static IEnumerable<Client> GetClients()
{
	// client credentials client
	return new List<Client>
	{
		new Client
		{
			ClientName = "angularclient",
			ClientId = "angularclient",
			AllowedGrantTypes = GrantTypes.Implicit,
			AllowAccessTokensViaBrowser = true,
			RedirectUris = new List<string>
			{
				"https://localhost:44347/authorized"
			},
			PostLogoutRedirectUris = new List<string>
			{
				"https://localhost:44347/unauthorized.html"
			},
			AllowedCorsOrigins = new List<string>
			{
				"https://localhost:44347"
			},
			AllowedScopes = new List<string>
			{
				"openid",
				"email",
				"profile",
				"dataEventRecords",
				"dataeventrecordsscope",
				"securedFiles",
				"securedfilesscope",
			}
		},
		new Client
		{
			ClientName = "angular2client",
			ClientId = "angular2client",
			AccessTokenType = AccessTokenType.Reference,
			//AccessTokenLifetime = 600, // 10 minutes, default 60 minutes
			AllowedGrantTypes = GrantTypes.Implicit,
			AllowAccessTokensViaBrowser = true,
			RedirectUris = new List<string>
			{
				"https://localhost:44311"

			},
			PostLogoutRedirectUris = new List<string>
			{
				"https://localhost:44311/Unauthorized"
			},
			AllowedCorsOrigins = new List<string>
			{
				"https://localhost:44311",
				"http://localhost:44311"
			},
			AllowedScopes = new List<string>
			{
				"openid",
				"dataEventRecords",
				"dataeventrecordsscope",
				"securedFiles",
				"securedfilesscope",
				"role"
			}
		}
	};
}
Implementing the Angular client
The angular client checks if it has a Bearer token to access the resource. If it doesn’t, it redirects to the IdentityServer where the user can logon. If successfully, it is redirected back to client, where it can then access the data in the resource server application. The Angular client in the code example is hosted at the URL: https://localhost:44347.
An AuthorizationInterceptor is used to intercept all http requests to the server and adds a Bearer token to the request, if its stored in the local storage. The angular-local-storage module is used to persist the token. The responseError is used to reset the local storage, if a 401 or a 403 is returned. This could be done better…
(function () {
    'use strict';

    var module = angular.module('mainApp');

    function AuthorizationInterceptor($q, localStorageService) {

        console.log("AuthorizationInterceptor created");

        var request = function (requestSuccess) {
            requestSuccess.headers = requestSuccess.headers || {};

            if (localStorageService.get("authorizationData") !== "") {
                requestSuccess.headers.Authorization = 'Bearer ' + localStorageService.get("authorizationData");
            }

            return requestSuccess || $q.when(requestSuccess);
        };

        var responseError = function(responseFailure) {

            console.log("console.log(responseFailure);");
            console.log(responseFailure);
            if (responseFailure.status === 403) {
                alert("forbidden");
                window.location = "https://localhost:44347/forbidden";
                window.href = "forbidden";

            } else if (responseFailure.status === 401) {

                alert("unauthorized");
                localStorageService.set("authorizationData", "");
            }

            return this.q.reject(responseFailure);
        };

        return {
            request: request,
            responseError: responseError
        }
    }

    module.service("authorizationInterceptor", [
            '$q',
            'localStorageService',
            AuthorizationInterceptor
    ]);

    module.config(["$httpProvider", function ($httpProvider) {
        $httpProvider.interceptors.push("authorizationInterceptor");
    }]);

})();
The SecurityService is used to redirect to the logon, and persist the token to the local storage. The redirect_uri parameter sent in the request token must match the client configuration on the server. The response_type must be set to token as we are using a javascript client. When the token is received in the hash from the IdentityServer, this is then saved to the local storage.
(function () {
    'use strict';

    function SecurityService($http, $log, $q, $rootScope,  $window, $state, localStorageService) {
        $log.info("SecurityService called");

        $rootScope.IsAuthorized = false;
        $rootScope.HasAdminRole = false;

        function urlBase64Decode(str) {
            var output = str.replace('-', '+').replace('_', '/');
            switch (output.length % 4) {
                case 0:
                    break;
                case 2:
                    output += '==';
                    break;
                case 3:
                    output += '=';
                    break;
                default:
                    throw 'Illegal base64url string!';
            }
            return window.atob(output);
        }

        function getDataFromToken(token) {
            var data = {};
            if (typeof token !== 'undefined') {
                var encoded = token.split('.')[1];
                data = JSON.parse(urlBase64Decode(encoded));
            }
            return data;
        }

        var ResetAuthorizationData = function () {
            localStorageService.set("authorizationData", "");
            localStorageService.set("authorizationDataIdToken", "");
            $rootScope.IsAuthorized = false;
            $rootScope.HasAdminRole = false;
        }

        var SetAuthorizationData = function (token, id_token) {

            if (localStorageService.get("authorizationData") !== "") {
                localStorageService.set("authorizationData", "");
            }

            localStorageService.set("authorizationData", token);
            localStorageService.set("authorizationDataIdToken", id_token);
            $rootScope.IsAuthorized = true;

            var data = getDataFromToken(token);
            for (var i = 0; i < data.role.length; i++) {
                if (data.role[i] === "dataEventRecords.admin") {
                    $rootScope.HasAdminRole = true;
                }
            }
        }

        var authorize = function () {
            console.log("AuthorizedController time to log on");

            //GET /authorize?
            //response_type=code%20id_token
            //&client_id=s6BhdRkqt3
            //&redirect_uri=https%3A%2F%2Fclient.example.org%2Fcb
            //&scope=openid%20profile%data
            //&nonce=n-0S6_WzA2Mj
            //&state=af0ifjsldkj HTTP/1.1

            var authorizationUrl = 'https://localhost:44345/connect/authorize';
            var client_id = 'angularclient';
            var redirect_uri = 'https://localhost:44347/authorized';
            var response_type = "id_token token";
            var scope = "dataEventRecords aReallyCoolScope securedFiles openid";
            var nonce = "N" + Math.random() + "" + Date.now();
            var state = Date.now() + "" + Math.random();

            localStorageService.set("authNonce", nonce);
            localStorageService.set("authStateControl", state);
            console.log("AuthorizedController created. adding myautostate: " + localStorageService.get("authStateControl"));

            var url =
                authorizationUrl + "?" +
                "response_type=" + encodeURI(response_type) + "&" +
                "client_id=" + encodeURI(client_id) + "&" +
                "redirect_uri=" + encodeURI(redirect_uri) + "&" +
                "scope=" + encodeURI(scope) + "&" +
                "nonce=" + encodeURI(nonce) + "&" +
                "state=" + encodeURI(state);

            $window.location = url;
        }

        var authorizeCallback = function () {
            console.log("AuthorizedController created, has hash");
            var hash = window.location.hash.substr(1);

            var result = hash.split('&').reduce(function (result, item) {
                var parts = item.split('=');
                result[parts[0]] = parts[1];
                return result;
            }, {});

            var token = "";
            var id_token = "";
            var authResponseIsValid = false;
            if (!result.error) {

                    if (result.state !== localStorageService.get("authStateControl")) {
                        console.log("AuthorizedCallback incorrect state");
                    } else {

                        token = result.access_token;
                        id_token = result.id_token

                        var dataIdToken = getDataFromToken(id_token);
                        console.log(dataIdToken);

                        // validate nonce
                        if (dataIdToken.nonce !== localStorageService.get("authNonce")) {
                            console.log("AuthorizedCallback incorrect nonce");
                        } else {
                            localStorageService.set("authNonce", "");
                            localStorageService.set("authStateControl", "");

                            authResponseIsValid = true;
                            console.log("AuthorizedCallback state and nonce validated, returning access token");
                        }
                    }
            }

            if (authResponseIsValid) {
                SetAuthorizationData(token, id_token);
                console.log(localStorageService.get("authorizationData"));

                $state.go("overviewindex");
            }
            else {
                ResetAuthorizationData();
                $state.go("unauthorized");
            }

        }

        var DoAuthorization = function () {
            ResetAuthorizationData();

            if ($window.location.hash) {
                authorizeCallback();
            }
            else {
                authorize();
            }
        }

        // /connect/endsession?id_token_hint=...&post_logout_redirect_uri=https://localhost:44347/unauthorized.html
        var Logoff = function () {
            //var id_token = localStorageService.get("authorizationDataIdToken");
            //var authorizationUrl = 'https://localhost:44345/connect/endsession';
            //var id_token_hint = id_token;
            //var post_logout_redirect_uri = 'https://localhost:44347/unauthorized.html';
            //var state = Date.now() + "" + Math.random();

            //var url =
            //    authorizationUrl + "?" +
            //    "id_token_hint=" + id_token_hint + "&" +
            //    "post_logout_redirect_uri=" + encodeURI(post_logout_redirect_uri) + "&" +
            //    "state=" + encodeURI(state);

            //ResetAuthorizationData();
            //$window.location = url;

            // 19.02.2106: temp until connect/endsession is implemented in IdentityServer4 NOT A PROPER SOLUTION!
            ResetAuthorizationData();
            $window.location = "https://localhost:44347/unauthorized.html";
        }

        return {
            ResetAuthorizationData: ResetAuthorizationData,
            SetAuthorizationData: SetAuthorizationData,
            DoAuthorization: DoAuthorization,
            Logoff: Logoff
        }
    }

    var module = angular.module('mainApp');

    module.factory("SecurityService",
        [
            "$http",
            "$log",
            "$q",
            "$rootScope",
            "$window",
            "$state",
            "localStorageService",
            SecurityService
        ]
    );

})();
This is then used by the AuthorizationController.
(function () {
    'use strict';

    var module = angular.module("mainApp");

    // this code can be used with uglify
    module.controller("AuthorizeController",
        [
            "$log",
            "$scope",
            "SecurityService",
            AuthorizeController
        ]
    );

    function AuthorizeController($log, $scope, SecurityService) {
        $log.info("AuthorizeController called");
        $scope.message = "AuthorizeController created";

        SecurityService.DoAuthorization();
    }
})();
Now the application can be used. The Visual Studio project is configured to start all three applications.
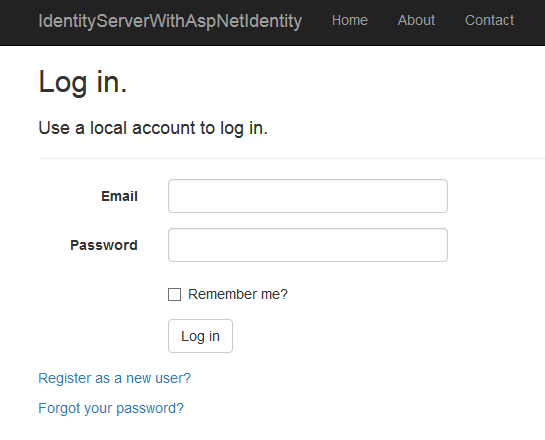
Once the application is started, you are redirected to the logon:
You can then view the client requested scopes and allow the application to use the scopes:

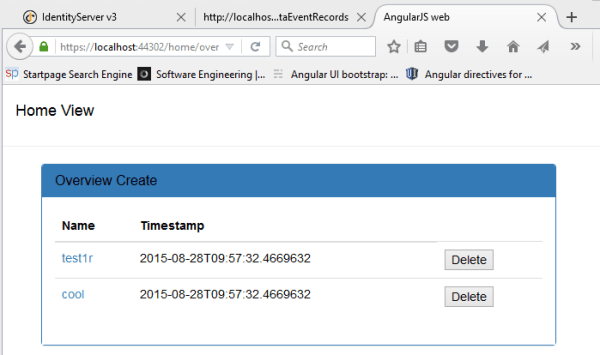
The application can access and use the resource server:
Links:
http://docs.identityserver.io/en/dev/quickstarts/6_aspnet_identity.html
https://github.com/IdentityServer/IdentityServer4
https://github.com/IdentityServer/IdentityServer4.Samples
The State of Security in ASP.NET 5 and MVC 6: OAuth 2.0, OpenID Connect and IdentityServer
https://github.com/tjoudeh/AngularJSAuthentication
http://dkbe.ch/post/include-user-properties-in-identityserver4-with-asp-net-core-identity
https://docs.asp.net/en/latest/security/authentication/identity.html
http://benfoster.io/blog/customising-claims-transformation-in-aspnet-core-identity


[…] OAuth2 Implicit Flow with Angular and ASP.NET 5 Identity Server – damienbod takes a look at implementing OAuth2’s Implicit Flow with ASP.NET 5 and Identity Server as well as an Angular based client. […]
Hi Damien thanks for the article. So if I need to check a user against a database this ( InMemoryUser{Subject = “48421156”, Username = “damienbod”, Password = “damienbod”,) is the line that I would modifiy? also, the authority and audience are hard coded, what if I want to deploy to azure? do I have to make those changes manually or could there be some sort of dynamic url assignment?
Hi
Thanks for your comment. Yes thats correct or you could add an Identity package which will do this for you. See the samples repo on github. The authority and the audience could be read from a config file and then you could deploy this on azure then.
Hope this helps
Greetings Damien
[…] OAuth2 Implicit Flow with Angular and ASP.NET 5 IdentityServer // weblogs.asp.net/aspnet-team […]
[…] 之前,damienbod写了一篇文章《OAuth2 Implicit Flow with Angular and ASP.NET 5 IdentityServer》(https://damienbod.com/2015/11/08/oauth2-implicit-flow-with-angular-and-asp-net-5-identity-server/)专门来介绍如何在ASP.NET 5中托管配置IdentityServer3,更进一步还介绍了如何实现OAuth2的Implicit Flow验证模式,来支持Angular客户端进行登录。 […]
Hi Damien,
Thanks for this post, I’ll give it a try and feedback.
Have you tried to deploy this to Azure?
I can’t find anywhere online how to do so.
Hi Mischa
Thanks, no I haven’t tried anything on Azure.
Greetings Damien
Great example. However I have a question regarding the Audience field.
Shouldn’t the Audience field be the receiver of the token’s URL (the Resource Server)?
In your example it seems it is the same as the Authority (the Identity Server): “https://localhost:44345/resources”
I don’t know if this is even required.
Thanks for the sample. I tried the solution and it works fine when using AngularClient, IdentityServerAspNet5 and ResourceServer projects.
When do we use IdentityServerAspNet5WithIdentity instead of IdentityServerAspNet5. I tried to start the IdentityServerAspNet5WithIdentity with IISExpess from vs2015 and it failed to start. Most likely I might have messed up the applicationhost.config. In what case do we need to use IdentityServerAspNet5WithIdentity. I see that it picks up the identity from the sqlite db.
Hi Arjun
Thanks for the comment. The IdentityServerAspNet5WithIdentity project does not work yet. The identity interfaces are not connected to IdentityServer yet. I planned to implement this but never got around to it.
If you wait, this will be probably be implemented by brockallen soon. It’s on my list of TODOs
Greetings Damien
how do i implement this on one project ?
Hi Nadav Tenne
Here’s the same question:
https://github.com/IdentityServer/IdentityServer4/issues/39
Greetings Damien
Good example, appreciate it. I have 2 questions: 1. Are there any examples of implementing DB users instead of In Memory? I have 19 thousand users so I doubt I’ll be adding them all when the Server starts up. Not sure how ID server deals with that. 2. How/where do you customize the login form? We will need to do that as well for our applications. Thanks again. Good stuff…
Hi Mark. Thanks.
The support for Identity or a user database will be implemented sometime after the ASP.NET Core RC2 release. The login form can be customized in the views (UI folder)
Greetings Damien
Perfect, thanks.
Hi Damien,
Thanks, great post. Do you have a .NET 4.5 with VS2013 and IdSrv3 implementation? That would be very helpful for the old-schoolers 🙂
Regards,
Daudi
HI Daudi.
No but here’s a great example
https://github.com/tjoudeh/AngularJSAuthentication
Greetings Damien
Thanks Damien,
I had already looked into Taiseer’s implementation. I don’t think he is using IdSrv. My real issue is that my company is using Okta (SAML2 provider) for authentication. I have successfully set up IdSrv to use Okta via Kentor’s OWIN Middleware sample. I’ve also looked at the Implicit Client (Token Manager) sample from IdSrv, where there is a nice library called oidc.js. I’ve been having mixed success putting it all together.
So far, I’ve managed to have everything working nicely on my local machine but things get a little tricky when I deploy to IIS.
Thanks again for posting this. Hopefully I’ll figure it out soon enough.
Regards,
Daudi
Thanks so much!!!
Very precious!
Thanks
how do i include entity framework users ?
Hi Nadav Tenne
You need to implement everything yourself or wait till the next update sometime after ASP.NET Core RC2 release. Then IdentityServer4 will be completed.
Greetings Damien
Entity Framework Users are now used in the example
I am getting this error in Angular2 client:
https://localhost:44390/api/DataEventRecords/1 404 (Not Found)
I am getting an exception in Repositories\DataEventRecordRepository.cs file on this line:
var unprotectedData = _protector.Unprotect(dataEventRecord.Description);
Exception thrown: ‘System.Security.Cryptography.CryptographicException’ in mscorlib.dll
Additional information: Unable to retrieve the decryption key.
I think I also got this error in one instance:
“The key {c301dae8-ede3-4841-af99-beb6c2003f31} was not found in the key ring.”
I can see a bunch of Keys being generated (.xml files). Is this normal or I should do something to prevent multiple “key” files being generated for each restart of IIS (debugging session).
Can you please explain how to setup this protector configuration.
Thanks
Rad
i had same issue..so i simply comment out those 2 function . also comment out where they are using…then create data it works..
I have to host spa client (angularJS), resource server (ASP.NET core WebApi) and IdentityServer/ASPIdentity in one deployable Asp.net core host. How can I do this?
Hi avareto
This is what I did on a project for a client. I cloned the example from IdentityServer, changed it as required and added the angular app. You need to change the startup to process both client routes and server routes and also change the default route.
If you would help you, I could create a public example.
Greetings Damien
A public sample would be really, really helpful! If it takes longer to publish it might be sufficient to post the StartUp source in the meanwhile …?
Thanks,
Avareto
Hi Avereto
It’ not quite finished yet, need to clean up some stuff. I’ll create a blog for this. Here’s the WIP Startup
https://github.com/damienbod/AspNet5IdentityServerAngularImplicitFlow/blob/singleAppWithIdentityResourceClient/src/ResourceWithIdentityServerWithClient/Startup.cs
greetings Damien
Great work Damien, really helpful for my new Angular 2 project
Thanks
Greetings Damien
Hi Damien, great article and code that helped me learn a lot about Identity server4 and authentication. I have a question: I am trying to use OAuth2Authentication (Windows server 2012 ADFS) with with your code base so that I can add additional claims from SQL server db. I can login through the external web page. But I am having problems in the ExternalLoginCallback in the host AccountController. _signInManager.GetExternalLoginInfoAsync(); retuns NULL thereby going back to the login again. I really appreciate if you can help with this. Thanks
Hi Lalith thanks. Don’t know any quick answer, I’ll have a look and see if I can reproduce it. Your using an external login with OpenID Implict Flow?
Greetings Damien
Since Windows server 2012 does not support OpenId, I am using OAuthAuthentication with bearer tokens. I am able to login into ADFS and return token back to Angular2 client but once start using the SQLLite storage to add additional roles I get into this problem.
Startup.cs:
public void ConfigureServices(IServiceCollection services)
{
var cert = new X509Certificate2(Path.Combine(_environment.ContentRootPath, “damienbodserver.pfx”), “”);
services.AddDbContext(options =>
options.UseSqlite(Configuration.GetConnectionString(“DefaultConnection”)));
services.AddIdentity()
.AddEntityFrameworkStores()
.AddDefaultTokenProviders();
services.AddMvc();
services.AddTransient();
services.AddTransient();
services.AddTransient();
services.AddDeveloperIdentityServer()
.SetSigningCredential(cert)
.AddInMemoryScopes(Config.GetScopes())
.AddInMemoryClients(Config.GetClients())
.AddAspNetIdentity()
.AddProfileService();
}
public void Configure(IApplicationBuilder app, IHostingEnvironment env, ILoggerFactory loggerFactory)
{
loggerFactory.AddConsole(Configuration.GetSection(“Logging”));
loggerFactory.AddDebug();
if (env.IsDevelopment())
{
app.UseDeveloperExceptionPage();
app.UseDatabaseErrorPage();
// Does not work with HTTPS
//app.UseBrowserLink();
}
else
{
app.UseExceptionHandler(“/Home/Error”);
}
app.UseStaticFiles();
app.UseIdentity();
app.UseIdentityServer();
app.UseCookieAuthentication(new CookieAuthenticationOptions
{
AuthenticationScheme = IdentityServerConstants.ExternalCookieAuthenticationScheme,
AutomaticAuthenticate = true,
AutomaticChallenge = true
});
var certificate = new X509Certificate2(Path.Combine(_environment.ContentRootPath, “signingCertificate.CER”), “”);
app.UseOAuthAuthentication(new OAuthOptions
{
DisplayName = “ADFS”,
//AutomaticAuthenticate = false,
//AutomaticChallenge = false,
AuthenticationScheme = “OAuth2”,
SignInScheme = IdentityServerConstants.ExternalCookieAuthenticationScheme,
SaveTokens = true,
//ClientId = “7fe2cdc6-4c2d-4d92-bac9-990df31f669c”,
ClientId = “9fe2cdc6-4c2d-4d92-bac9-990df31f669g”,
ClientSecret = “notneeded”,
CallbackPath = new Microsoft.AspNetCore.Http.PathString(“/About”),
AuthorizationEndpoint = “https://fsstars-bo-adfs.linkedgaming.com/adfs/oauth2/authorize”,
TokenEndpoint = “https://fsstars-bo-adfs.linkedgaming.com/adfs/oauth2/token”,
Events = new OAuthEvents
{
OnRedirectToAuthorizationEndpoint = context =>
{
context.Response.Redirect($”{context.RedirectUri}&resource=StarsRelyingTrustProvider”);
return Task.FromResult(0);
},
OnCreatingTicket = context =>
{
//var signingCert = new X509Certificate2(“signingCertificate.cer”);
JwtSecurityTokenHandler tokenHandler = new JwtSecurityTokenHandler();
var validateParameters = new TokenValidationParameters
{
ValidateIssuerSigningKey = true,
IssuerSigningKey = new X509SecurityKey(certificate),
ValidateAudience = true,
ValidateIssuer = true,
ValidAudience = “microsoft:identityserver:StarsRelyingTrustProvider”,
ValidIssuer = “http://FSSTARS-BO-ADFS.linkedgaming.com/adfs/services/trust”,
RequireSignedTokens = true
};
SecurityToken securityToken;
tokenHandler.ValidateToken(context.AccessToken, validateParameters, out securityToken);
ClaimsIdentity identity = new ClaimsIdentity(((JwtSecurityToken)securityToken).Claims, context.Options.AuthenticationScheme, “winAcct”, “role”);
foreach (var claim in identity.Claims)
context.Identity.AddClaim(claim);
var user = context.User;
var ident = context.Identity;
return Task.FromResult(0);
}
}
});
app.UseMvc(routes =>
{
routes.MapRoute(
name: “default”,
template: “{controller=Home}/{action=Index}/{id?}”);
});
}
AccountController.cs: Just like I the sample. And it returns NULL on “await _signInManager.GetExternalLoginInfoAsync()”.
Our requirement just like the Angiular2 client accessing WebApi.
I can send you the complete code if you can share your email.Thanks
Some how looks like my last reply got lost. I am actually using OAuthAuthentication with ADFS As ADFS on Windows Server 2012 does not support OpenId. I can send you the code if you share your email. I get the error I showed above.
thanks for article first. when i run angular2 client i got this message “This is server routing, not angular2 routing” but when i open cmd then npm start i can get correct webpage…how can i run angular2 client on visual studio? can you help?
you might need to build the angular app
$ npm install
$ npm run build-production
Greetings Damien
thanks .i just run npm start .it works with port 8080 so i change all port to 8080 without https now it works fine…thank you so much answer also article…i really like this ariticle.
cool, thanks
i download src code from github ..but i cant find out AuthorizationInterceptor …did i wrong?
Hi Damien!
I would love to use IdentityServer4 as a single STS for all my apps, but I personally hate (and many of our users as well) to be re-direct from the web app to a different URL and different UI for entering username and secret password credentials. This scares a lot of users which are not used to this model, to be trapped in a phishing attack. This is especially true for mobile apps environments. Is there a way to get all the IdentityServer4 benefits, but instead of redirecting and rendering the IdentityServer4 UI, just calling a WebApi of the IdentityServer4 with the username and password as parameter and with https from the client app (client backend), to get back the token which will be than returned to the SPA?
Avareto
Hi Damian, thanks for your great post. I have one problem which i cannot solve so far. The redirect_uri in the authorize-Function contains a “#” for my solution, but the part behind the # cannot be send to the server (standard, i know). Do you have any tips how you solved this? why do you not have a # for your routing?
Thanks a lot for your answer.
After you have logged in using angular-auth-oidc-client and IdentityServer4 missing query parameters, so redirect_url single and without the current query parameters. Like using angular-auth-oidc-client to sign with the preservation of those query parameters that have been pre-login via angular-auth-oidc-client? Maybe there is a possibility to save the current route with query parameters in post_login_route?
Yes, this is possible. You can activate the authorization event and use this instead to redirect to the URL before the login. See the API documentation
How to add sliding expiration with this